
Easy Sourdough Bread Recipe for Beginners


Why This Is the Only Sourdough Recipe I Actually Use
Jump to RecipeOkay. So here’s the thing. There are 700,000 sourdough recipes online. Everyone’s like “high hydration this” and “coil fold that” and I’m like… ma’am, I have children. What does that literally even mean?
This is my tried-and-true plain sourdough loaf. It works. Every time.
It’s simple.
It’s forgiving.
It fits into real life.
If you’re a beginner or a busy mom, this recipe is for you.
Ingredients (Nothing Fancy, I Promise)
- 370g distilled water
- 510g bread flour
- 10g salt
- 100g active sourdough starter
That’s it.
No drama. No weird additions. No 14-step process.
Step-by-Step: My Exact Process
Step 1: Mix Everything Together
I literally mix:
- Water
- Flour
- Salt
- Active starter
All at once.
No fancy separate autolyse. No complicated timing.
Mix until shaggy and combined.
Then leave it on the counter for 1–2 hours.
That’s it. Walk away. Go do mom things.
Step 2: Stretch and Folds (The “Whatcha Doing” Phase)
After it rests, I start stretch and folds.
I do them:
- Every 30 minutes
- For 2 hours total
So that’s about 4 rounds.
And listen, they don’t have to be perfect. Just grab the dough, stretch it up, fold it over. Turn the bowl. Repeat. I do it until it feels like I have some tension in the bread. Like it doesn’t want to stretch anymore.
This builds strength so your loaf doesn’t come out flat and sad.
Step 3: Bulk Fermentation (Let It Do Its Thing)
After stretch and folds, I let it sit on the counter until doubled.
For me, that’s about 6 hours.
This depends on your kitchen temp. Warmer kitchen = faster rise.
You’ll know it’s ready when:
- It’s puffy
- Jiggly
- Has bubbles
- Looks alive
Not dense. Not tight. Not “meh.” Not sticky.
Step 4: Shape It & Banneton Time
I shape it (nothing crazy, just building tension), then place it seam-side up in a floured banneton.
Then into the fridge it goes.
Minimum: 12 hours
Maximum: 72 hours
And yes, the longer it sits, the more flavor develops. This is where the magic happens.
Cold Fermentation = Flavor
If you’ve ever had bland sourdough and wondered why?
It probably didn’t ferment long enough.
That fridge time:
- Deepens flavor
- Improves texture
- Makes scoring easier
- Helps oven spring
It also gives you flexibility, which as a mom? We need.

Step 5: Bake Day (My Exact Oven Method)
Preheat
- Oven to 450°F
- Dutch oven inside while it heats
Don’t skip preheating the Dutch oven. That’s what gives you that bakery crust.
Bake – Lid On
- 35 minutes
- 450°F
- Parchment paper underneath
Steam stays trapped. That’s how it rises properly.
Bake – Lid Off
- Drop temp to 425°F
- Bake another 20 minutes
This is where it gets golden and beautiful.
The Hardest Part: DO NOT CUT IT
Let it rest 1–2 hours minimum.
I know. I know. But if you cut it early, it’ll be gummy inside.
The steam finishes cooking the crumb while it cools. Trust the process.

Classic Sourdough Loaf
Equipment
- 1 Dutch Oven
- 1 Kitchen Scale
Ingredients
- 370 g distilled water
- 510 g bread flour
- 10 g salt
- 100 g active sourdough starter
Instructions
Mix the Dough
- In a large bowl, combine distilled water, bread flour, salt, and active sourdough starter. Mix until fully incorporated and a shaggy dough forms.
- Cover and let rest at room temperature for 1–2 hours.
Stretch and Fold
- Perform stretch and folds every 30 minutes for 2 hours (about 4 rounds total).
- To do this, grab one side of the dough, stretch it upward, and fold it over itself. Rotate the bowl and repeat on all sides.
Bulk Fermentation
- After stretch and folds are complete, let the dough rest at room temperature until doubled in size. This typically takes about 6 hours, depending on kitchen temperature.
- The dough should look puffy, slightly domed, and jiggly.
Shape the Dough
- Turn the dough onto a lightly floured surface. Shape into a tight round by gently pulling the dough toward you to build surface tension.
- Place seam-side up into a floured banneton.
Cold Fermentation
- Cover and place the banneton in the refrigerator for at least 12 hours and up to 72 hours.
- Longer fermentation develops deeper sourdough flavor.
Preheat the Oven
- Preheat oven to 450°F with your Dutch oven inside. Allow the Dutch oven to fully preheat before baking.
Score and Bake (Lid On)
- Place dough onto parchment paper. Score the top with a bread lame or sharp knife.
- Transfer dough (with parchment) into the hot Dutch oven.
- Bake covered for 35 minutes at 450°F.
Finish Baking (Lid Off)
- Remove the lid, reduce oven temperature to 425°F, and bake for an additional 20 minutes until deeply golden brown.
Cool Completely
- Remove bread and allow it to cool for at least 1–2 hours before slicing. This allows the internal steam to finish cooking the crumb.
Notes
- This recipe is approximately 75% hydration.
- Kitchen temperature affects fermentation time.
- Longer cold fermentation increases flavor.
- Do not cut into bread while hot or the crumb may become gummy.
Troubleshooting (Because Sourdough Can Be Dramatic)
Let’s talk about the things no one explains.
Why Is My Sourdough Dense?
Usually:
- Starter wasn’t active enough
- It didn’t bulk ferment long enough
- You rushed the process
If your dough didn’t double before shaping, that’s probably it.
Why Is My Loaf Flat?
Flat loaf = no tension.
When shaping, you need to create surface tension. Pull it toward you slightly on the counter.
Also, overproofing can cause collapse.
Why Is My Crumb Gummy?
Two main reasons:
- You cut it too soon
- It was slightly underbaked
Bake until it’s deeply golden, not pale.
Why Didn’t It Rise in the Oven?
Check:
- Was your starter bubbly and doubling before mixing?
- Did you preheat the Dutch oven long enough?
- Was it overproofed in the fridge?
Oven spring depends on all three.
Why This Recipe Works for Busy Moms
Because:
- You can stretch and fold while making dinner.
- You can leave it in the fridge up to 3 days.
- You bake when it works for YOU.
- It’s predictable.
No chaos. No 27 steps.
Just mix, fold, rest, bake.
Frequently Asked Questions
How long can I leave sourdough in the fridge?
12–72 hours. Flavor increases over time.
Can I use all-purpose flour instead of bread flour?
Yes, but bread flour gives better structure and chew. You definitely will need to adjust for all purpose flour.
How do I know my starter is ready?
It should double in size. It should also smell bready. Not like acetone (if it does, it’s hungry).
What hydration is this recipe?
About 75% hydration, perfect balance of open crumb and easy handling.
Can I freeze sourdough bread?
Yes!
Sourdough doesn’t have to be intimidating.
It’s just flour, water, salt, and time. And honestly? It fits into real life better than most baking recipes.
You don’t have to be perfect. You don’t have to be fancy. You just have to start.
Amazon Finds + My 1849 Gold Rush Starter Kit 🥖
Let’s make this easy.
If you’re starting from scratch and thinking, “Okay but what do I actually need?”
Here’s your simple sourdough starter kit.
No gatekeeping. No 47 tools.
Your Beginner Sourdough Kit
You really only need:
- ✔️ A digital kitchen scale (non-negotiable — measuring in grams matters)
- ✔️ A banneton basket
- ✔️ A bread lame for scoring
- ✔️ A Dutch oven
- ✔️ Parchment paper
- ✔️ My dehydrated starter (obviously)
That’s it.
You do not need:
- A proofing cabinet
- A $300 mixer
- A sourdough degree
Just flour, time, and a little patience.
About My Starter (She’s Got History)
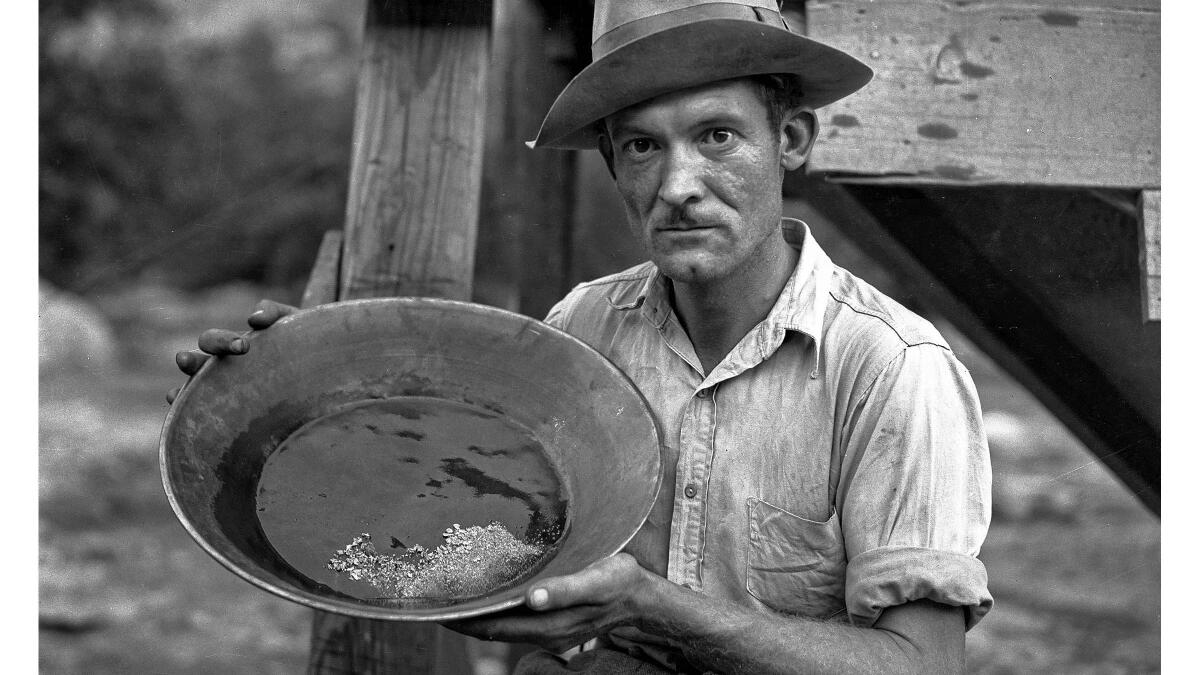

Okay. This part is actually insane.
This starter was born in 1849.
It traces back to a bread starter carried by Basque gold miners to San Francisco at the start of the Gold Rush.
The starter they brought over? Originally… unexciting.
But once it combined with the distinctive wild yeasts and lactobacilli in San Francisco’s air?
It transformed into something sour, chewy, and completely iconic. Local bakeries quickly adopted it.
One bakery maintained that same line continuously from the 1850s until just a few years ago.
Before the bakery closed, someone quietly took a portion of that living starter (we don’t ask questions 😌) and transported it to Toronto.
From there, it eventually made its way all the way down to the Lowcountry.
And now? It’s in my kitchen. And it can be in yours.
Why a Historic Starter Matters
Is flour still flour? Yes.
But mature starters:
- Ferment more predictably
- Develop deeper flavor
- Produce stronger structure
- Create that classic San Francisco tang
You’re not just baking bread.
You’re feeding something that’s been alive since 1849.
That’s wild.
How My Dehydrated Starter Works
If you order my dehydrated starter, you’ll:
- Rehydrate it
- Feed it
- Watch it come back to life
It’s beginner-friendly. I’ll include simple activation instructions.
Within a few days, you’ll have an active, bubbly starter ready for your first loaf.
And honestly? There’s something really special about reviving something with that kind of history.
Now It’s Your Turn
You don’t need to be perfect.
You don’t need to understand wild yeast microbiology.
You just need:
- A scale
- A Dutch oven
- And a little patience
This starter has survived:
- The Gold Rush
- Bakery closures
- International travel
- And now my chaotic mom kitchen
It can survive yours too.


